- Hiding Fields on the Checkout Page
- Installing WooCommerce
- Using WooCommerce
- Using Your Theme's Header & Footer in a Step
- Embedding a Checkout Form on the CartFlows Checkout Page
- Hiding WooCommerce Pages and Products
- Using Pricing Tables
- Adding an Affiliate Program
- Setting a Funnel as the Homepage
- GDPR Compliance
- Dynamic Offers aka Rule Engine
- Instant Layout for Checkout and Thank You Step
- Adding Products from the URL to the Checkout Page
- Setting Up A/B Testing for Steps
- Deleting Plugin Data During Uninstallation
- Importing Ready-Made Templates for Funnels and Steps
- Importing and Exporting Funnels and Step
- URL Parameters
- Replacing the Main Checkout Order with an Upsell or Downsell
- Rolling back to a Previous Version
- Google Address Autocomplete
- Flatsome UX Builder
- ActiveCampaign
- Paypal Reference Transactions
- How PaypPal/Stripe Works
- Enabling Enfold Avia Layout Builder
- Setting Up Authorize.net for Upsell & Downsell
- Supported Payment Gateways
- Setting Up A/B Testing with Google Optimize
- Setting Quantity and Discount for Products on the Checkout Page
- Funnel in Test Mode
- Troubleshooting Plugin and Theme Conflicts
- Resolving the "Please Select a Simple, Virtual, and Free Product" Error
- Fixing Endless Loading on the Checkout Page
- Fixing the "We can't seem to find an order for you." Error on the Thank You Page
- Fixing the "Checkout ID Not Found" Error
- Fixing the "Session Expired" Error Message
- Resolving "Order Does Not Exist" Error on Upsell/Downsell Page
- Fixing the "Sorry, This Product Cannot Be Purchased" Error
- Resolving "No Product is Selected" Error
- Disabling Auto-fill of Address Fields Based on Zip Code
- Enabling Theme's Scripts & Styles Without Changing Page Template
- Disabling Auto-fill of Checkout Fields
- Allowing Cache Plugins to Cache CartFlows Pages
- Changing the "Choose a Variation" Text
- VAT Field Not Displaying for WooCommerce EU/UK VAT Compliance Plugin
- Enabling the Product Tab on Store Checkout
- Displaying the Order Summary Open on Mobile Devices
- Refreshing the Checkout Page After CartFlows AJAX Calls
- Overview
- Installing
- Activating License Key
- Customizing General Settings
- Customizing Cart Tray Labels
- Customizing Cart Icon Settings
- Customizing Cart Tray Styling
- Understanding the Product Recommendations Feature
- Controlling Product Recommendation Source for Empty Cart
- Controlling When the Cart Opens After Adding Products
- Enabling Free Shipping in WooCommerce
- Configuring Upsell and Cross-Sell Products in WooCommerce
- Using a Custom Image for the Floating Cart Icon
- Setting Custom Product Recommendations in the Cart
- Opening the Cart Using a Custom Button or Link
- Floating Icon Styling
- Cart Opening Direction
- Popup Cart Feature
Cart Opening Direction
The Cart Opening Direction feature in Modern Cart for WooCommerce lets you control from which side of the screen the slide-out cart appears when opened. This gives you flexibility to match your site’s design and improve user experience.
You can choose to open the cart from the left or right side of the screen — making it intuitive for your audience based on reading direction or site layout.
Why Use Cart Opening Direction?
Setting the correct opening direction helps ensure your cart feels natural and unobtrusive. Here’s why this feature is useful:
- User Experience: Align the cart behavior with your visitors’ reading flow — right side for LTR languages and left side for RTL languages.
- Design Flexibility: Prevent overlaps with other elements like sticky menus or sidebars.
- Accessibility: Enhance usability for multilingual or RTL-based sites.
How to Set the Cart Opening Direction?
Step 1: Navigate to the Modern Cart Settings, then click on the General Tab.
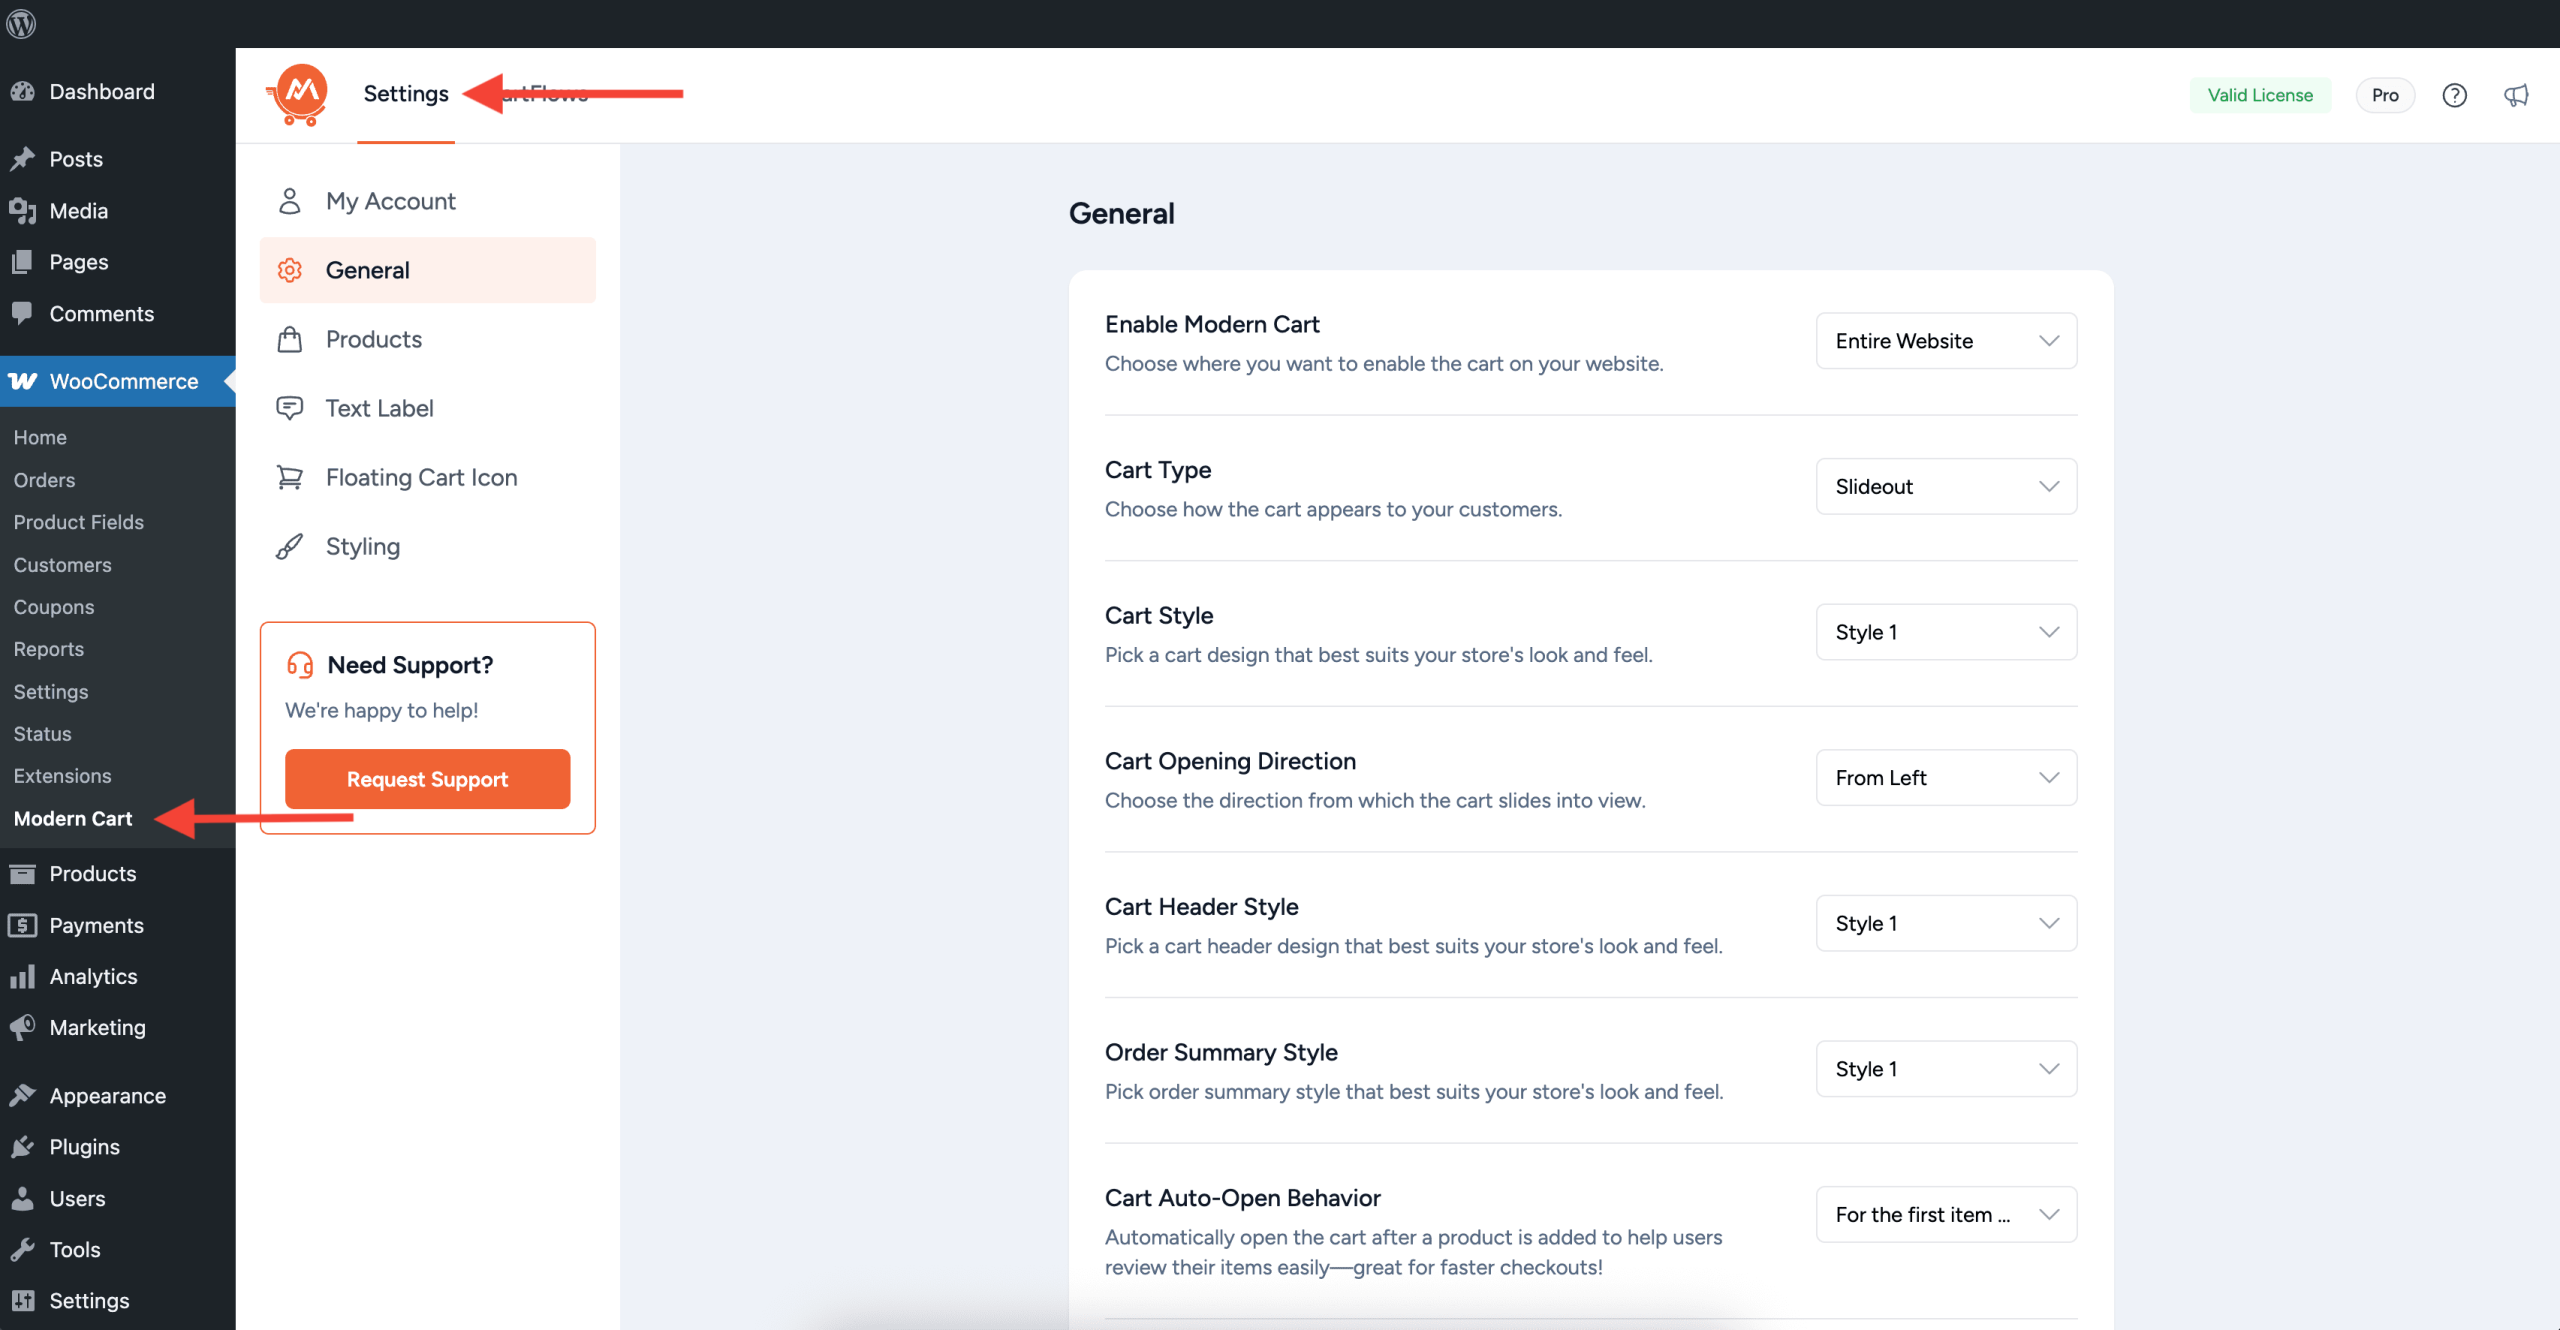
Step 2: Inside the General Tab, you will find the Cart Opening Direction setting.
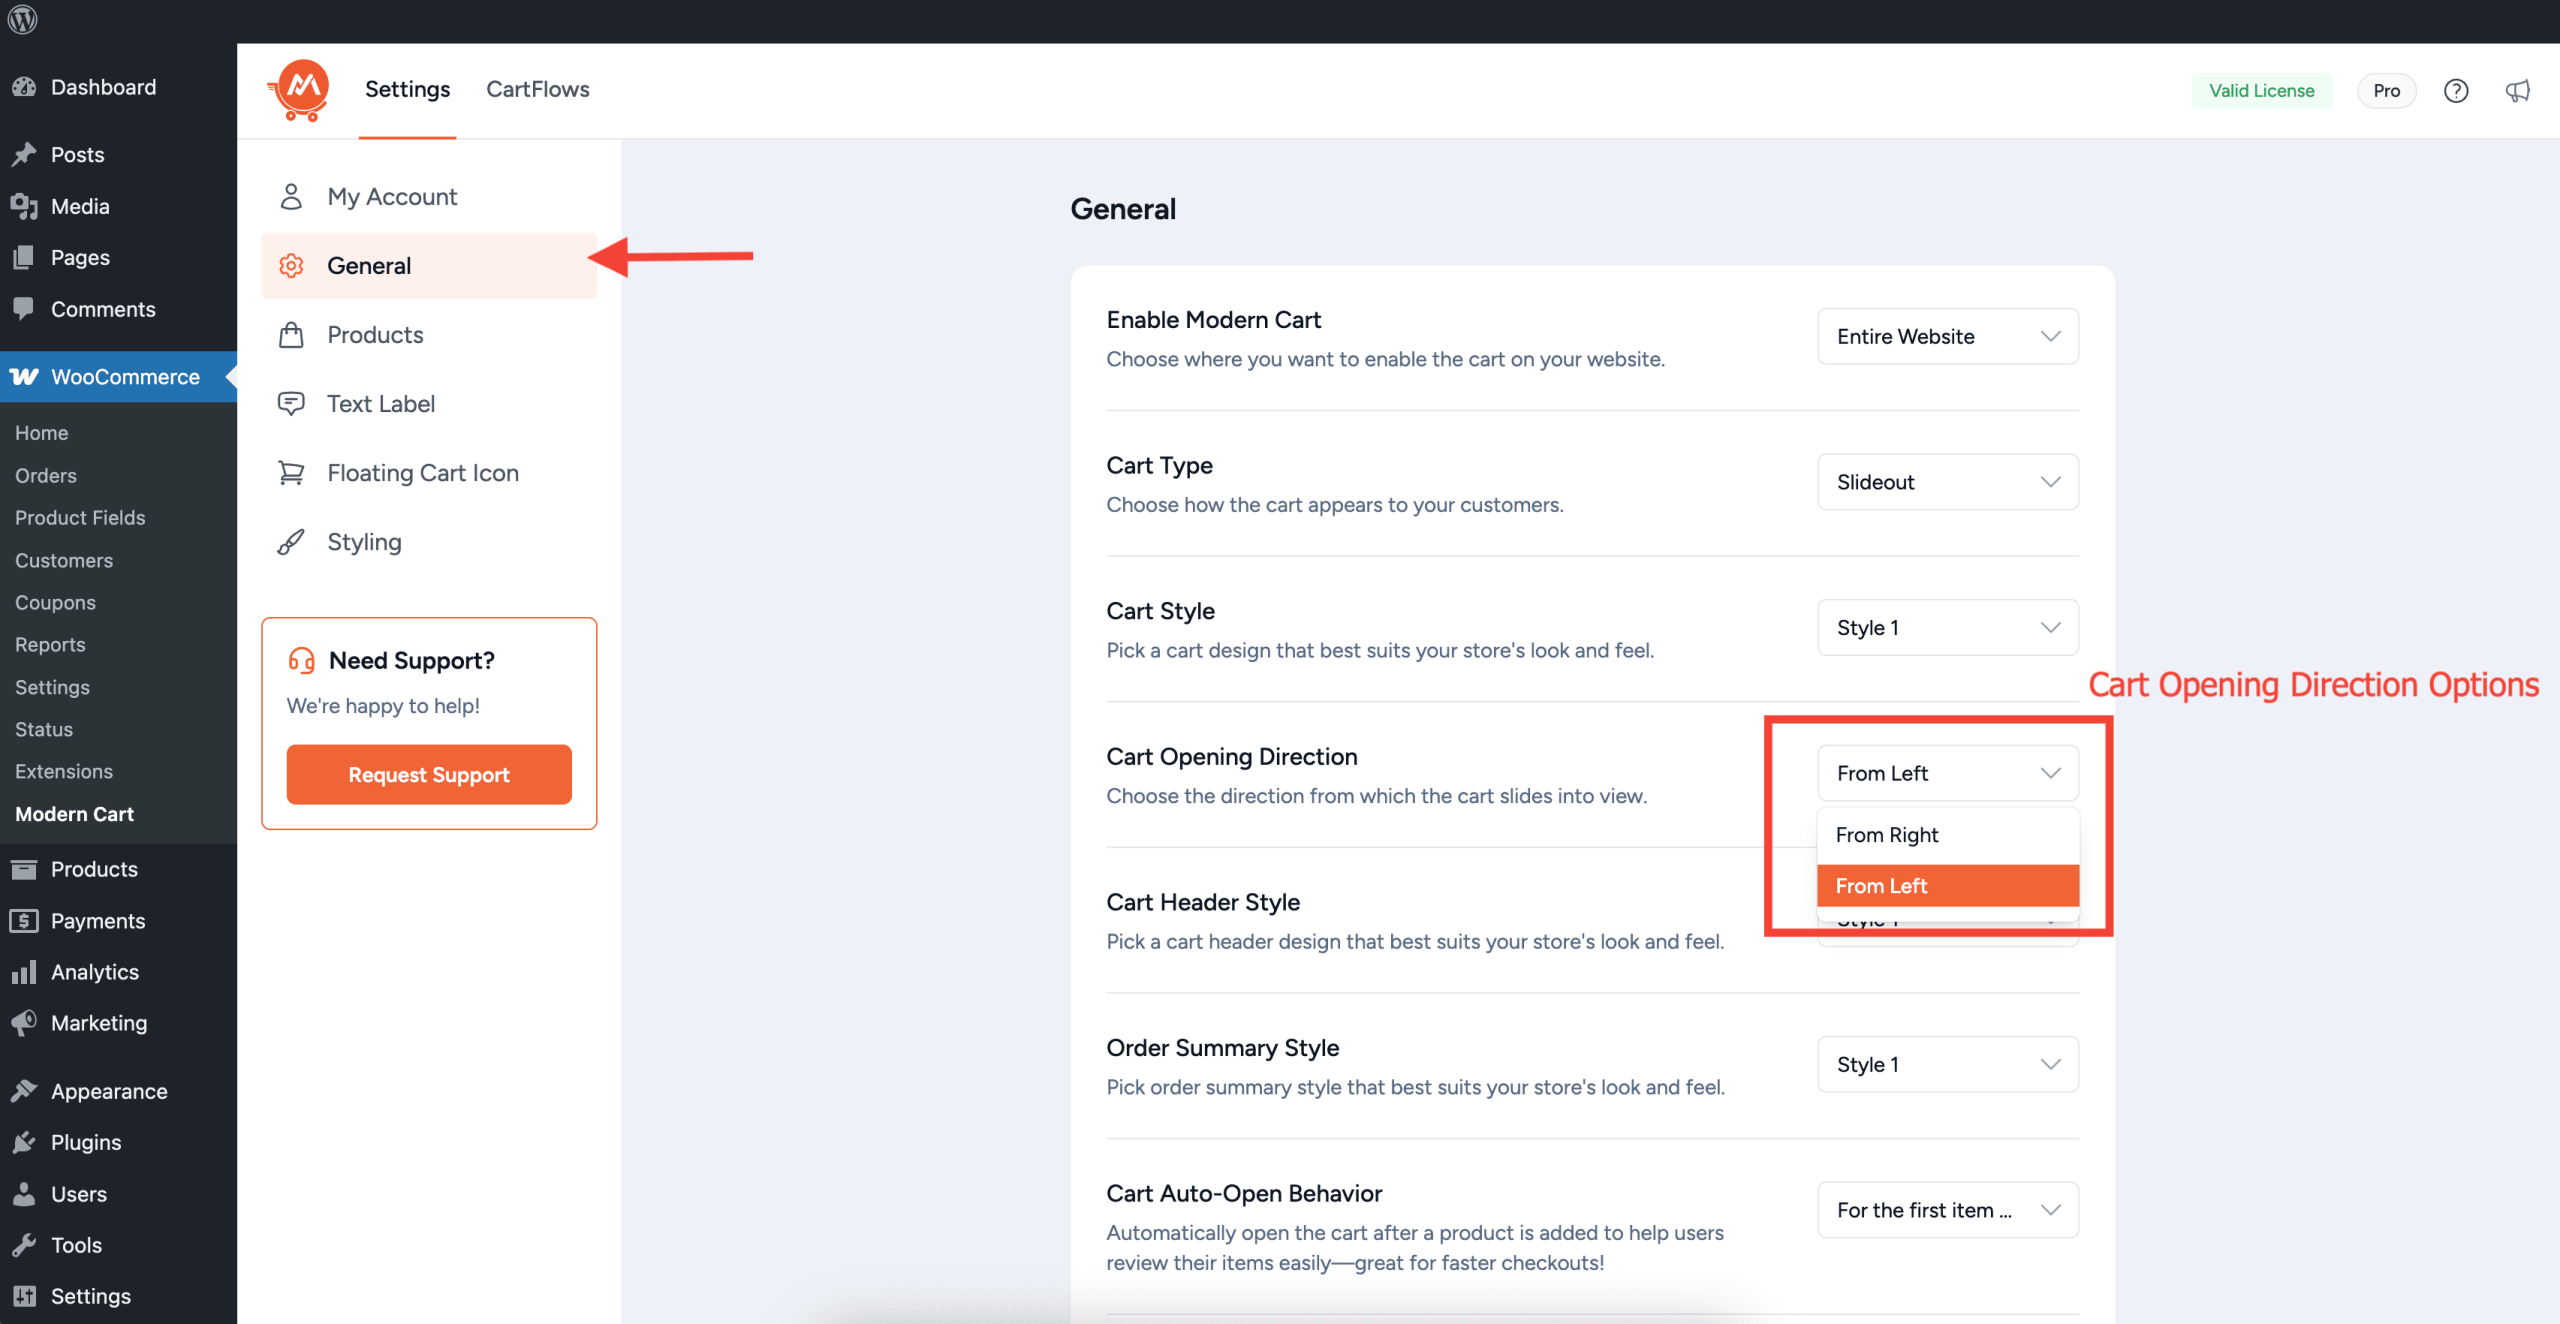
Once saved, the cart will always slide in from your chosen side whenever a user clicks the floating cart icon.
We don't respond to the article feedback, we use it to improve our support content.
